Setting assignment due dates in Moodle is essential for faculty to establish clear expectations, promote time management, ensure academic integrity, streamline grading, and facilitate communication with students. It enables a structured learning environment, helps students prioritize their workload, and allows for efficient progress monitoring and feedback.
Set Assignments with a Due Date Only
This procedure assumes that an assignment is already developed and only explains how to set the due date for that assignment.
Step 1
Click the Search Icon and type in the assignment name (completely or partially). Click the assignment you want to change the due date of, and it will take you to the week it is in.


Step 2
Open the Assignments and Activities accordion, select the arrow at the top right of the assignment, and click the Edit settings option to edit the assignment settings. (Note: The assignment will be marked with a location pin.)

Step 3
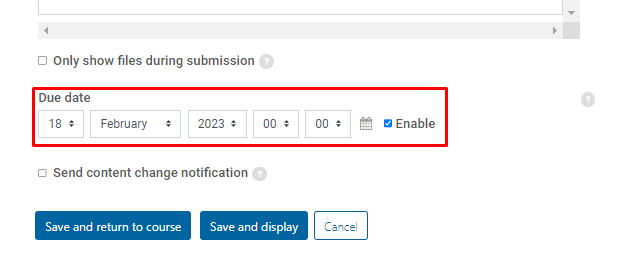
Scroll down to the due date under the description.
a) Due Date: This is when the assignment is due. Verify you have Enabled the due date, and choose the date and time. (The due date time will reflect your profile's time zone. Please refer to the following article for details about how to change the time zone: Updating your Moodle profile and time zone)
Submissions will still be allowed after this date, but any assignments submitted after the date are marked as late. To prevent submissions after a specific date - set the assignment cut-off date.

Step 4
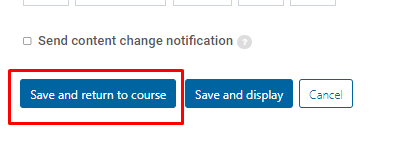
Click on Save and return to course after you have finished editing the assignment settings.

Step 5
Check your work by clicking on the Block Drawer and selecting Assignments from the Activities and Resources block.

Step 6
Now you can see a list of the assignments and their due dates.

Set Both the Due Date and the Cut-off Date
Step 1
Click the Search Icon and type in the assignment name (completely or partially). Then click the assignment you want to change the due date of, and it will take you to the week it is in.


Step 2
Open the Assignments and Activities accordion, select the arrow at the top right of the assignment, and click the Edit settings option to edit the assignment settings. (Note: The assignment will be marked with a location pin.)

Step 3
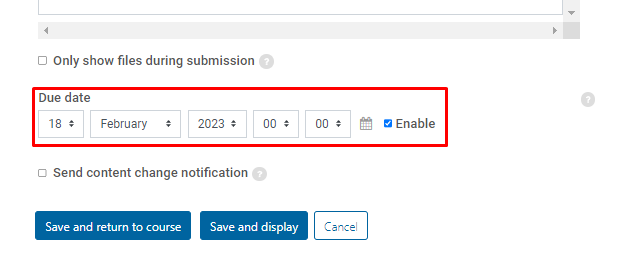
Set the Due Date.
a) Due Date: This is when the assignment is due. Submissions will still be allowed after this date, but any assignments submitted after this date are marked as late. To prevent submissions after a specific date - set the assignment cut-off date.

Step 4
Browse the Availability settings on the right side of the Assignment Description to configure additional dates.

Step 5
Set the Cut-off Date.
a) Cut-off date: If set, the assignment will not accept submissions after this date without an extension from the instructor.
b) Allow submissions from: If enabled, students will not be able to submit before this date. If disabled, students will be able to start submitting right away.

Step 6
Scroll to the bottom of the page and click on Save and return to course.

Step 7
Check your work by clicking on the Block Drawer and selecting Assignments from the Activities and Resources block.

Step 8
Now you can see a list of the assignments and the due dates. (The due date time will reflect your profile's time zone. Please refer to the following article for details about how to change the time zone: Updating your Moodle profile and time zone)
