The most common "activity" teachers create in Moodle is called Assignment. There are three types of assignments:
- File submission: this is the most common, in which students are required to upload one or more files
- Online text: this is less common, in which students enter (or paste) text right on the screen.
- Offline assignment: this type is used when faculty have an in-class or offline activity they want to grade inside Moodle (e.g., practical exam, oral presentation, in-class written quiz).
Please follow the steps below on how to create a File Submission assignment.
Create a new Assignment
Step 1
Navigate to the week where you want the assignment to be located and click Create learning activity.

Step 2
Choose Assignment from the Activities tab.

Step 3
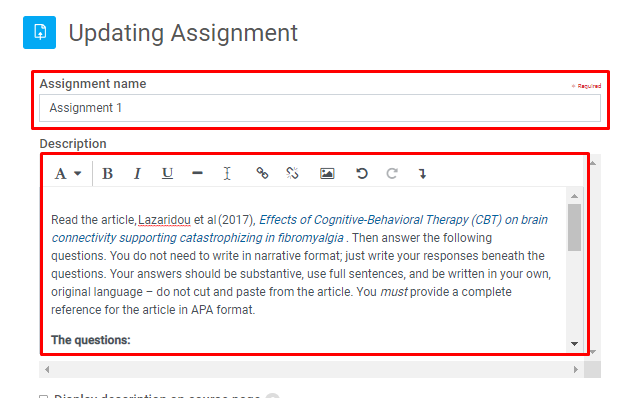
Give the assignment a name, write the description (usually the directions), and set a due date. TIP: If your assignment is very complex, you should compose it in Word and paste it into the Description field to avoid losing your progress.
Step 4
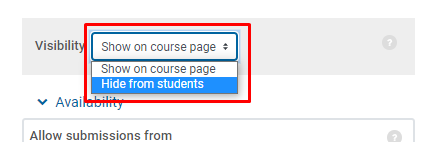
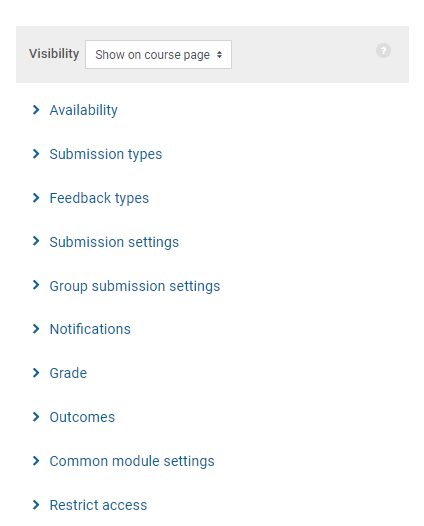
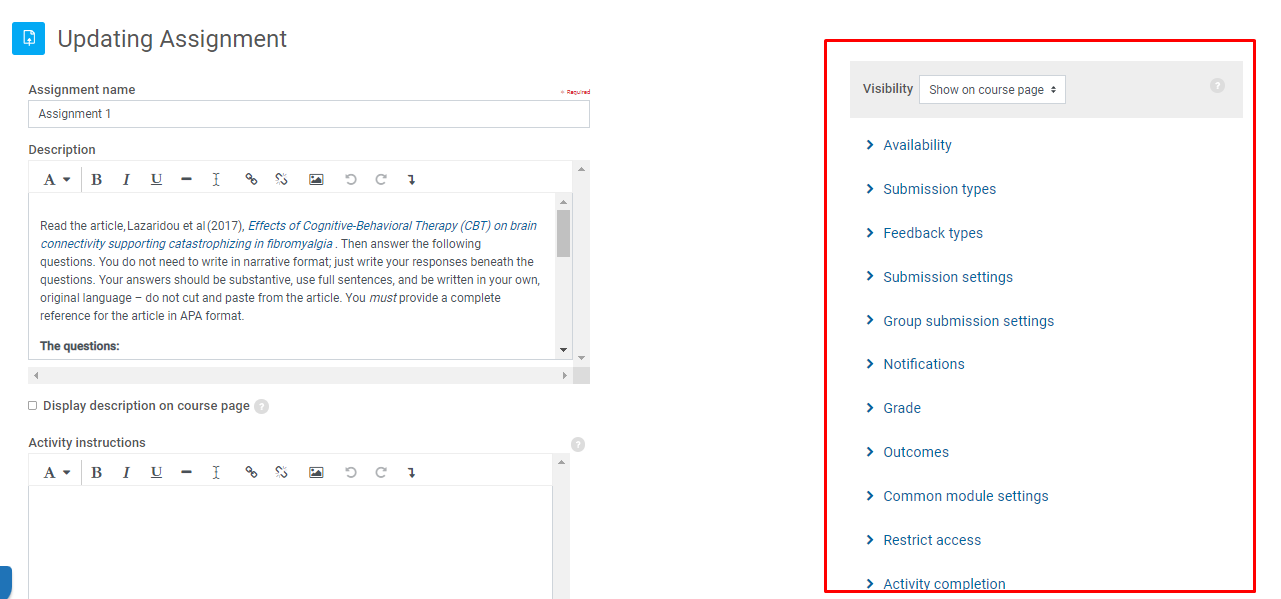
From the Visibility tab, select whether to show or hide the assignment. It is recommended to keep it hidden until you have thoroughly checked your work.
Step 5
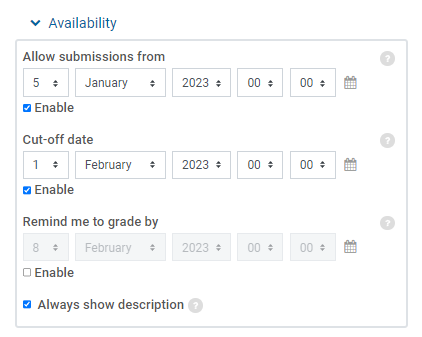
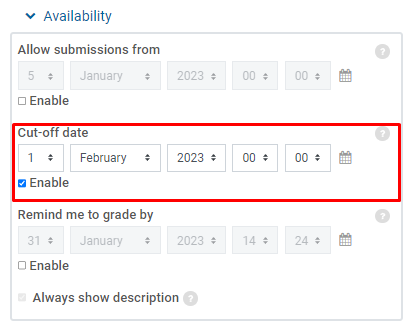
From the Availability tab, enable the Cut-Off date. Warning: The Cut-off date is not the same as the Due Date. If you do not set the Cut-off date for the assignment, a student will be able to continue to edit their submission even after it has been graded. If you do not accept late assignments, the Cut-off Date must be the same as the Due Date. You might also want to set up Allow submissions from date. If this isn't set, students can add submissions as soon as the assignment is created.
Step 6
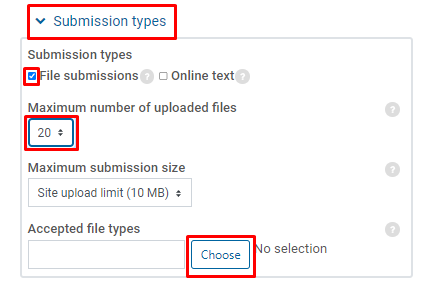
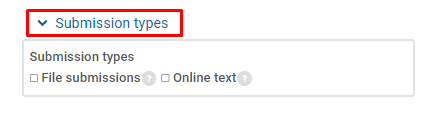
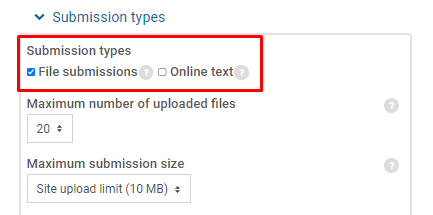
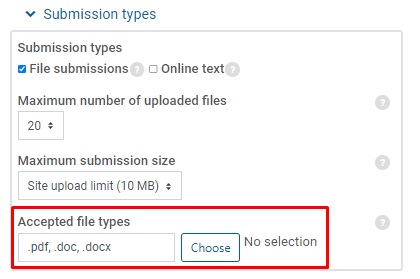
Under the Submission types section, choose which and how many files can be uploaded (for this example, we will use File submissions). We recommend setting the Maximum number of uploaded files to 20. Then click on Choose under Accepted file types.
Step 7
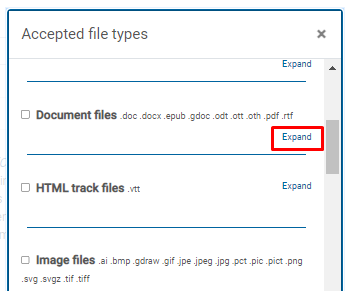
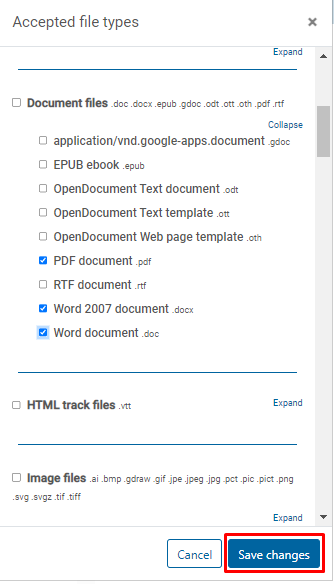
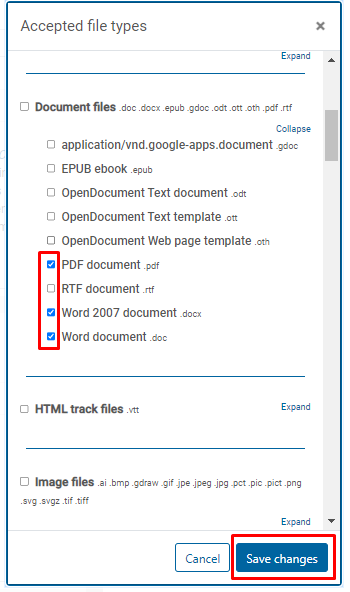
Expand the Document Files category and select the desired file types. We recommend using .pdf,.docx, and .doc. If you only want to allow certain types of Document Files, these should be selected before clicking Save Changes.
Step 8
Click on the Grade section. Next, choose a Grade Type and Grading method. Setting a point value for each assignment is the most simple and standard way. Simple direct grading is the easiest grading method to set up.
Grading by weight, category, and rubric is more complex. If you want help with more advanced grading methods, please place a support ticket or talk to your department chair about setting up a team training session.
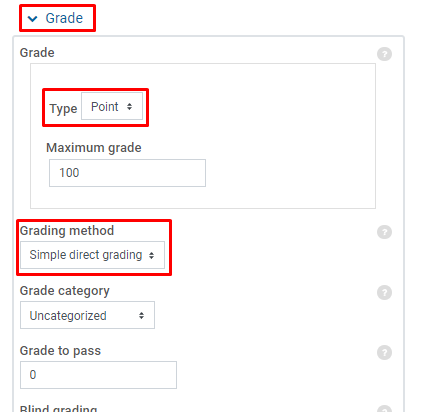
It is generally recommended that other settings be left at their defaults. If you want help with more advanced settings, please place a support ticket.
Step 9
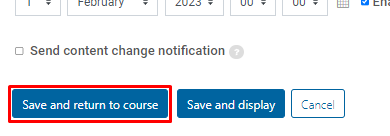
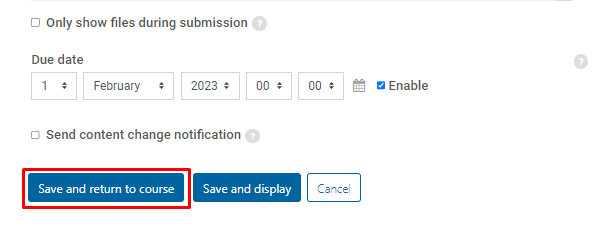
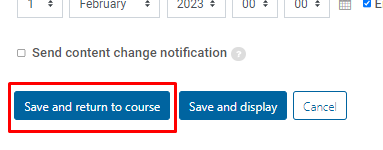
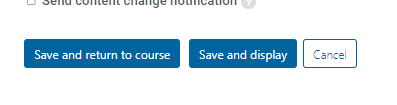
Click Save and return to course.
Step 10
You will now see your assignment in that week.

Edit an Existing Assignment
Step 1
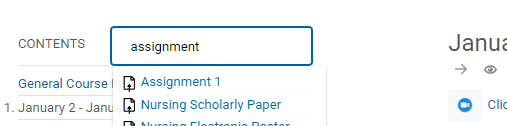
Click on the search button and search for the assignment you would like to edit. Then click on the assignment.
Step 2
You will be taken to the week where the assignment is located. Open the Assignments and Activities accordion and click the Arrow Icon to edit the assignment settings.

Alternate Method
Step 1
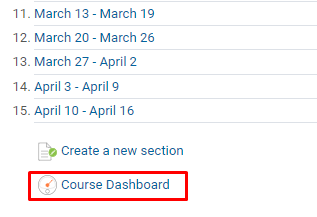
Click the Course Dashboard
Step 2
Go to the Activities and Resources section and click on Assignments

Step 3
Select the assignment you want to edit:

Step 4
Click on the Admin Gear and select Settings

Adjust Settings
Step 1
Adjust any settings within the Settings section
Step 2
Once you have edited the assignment, click on Save and return to course.
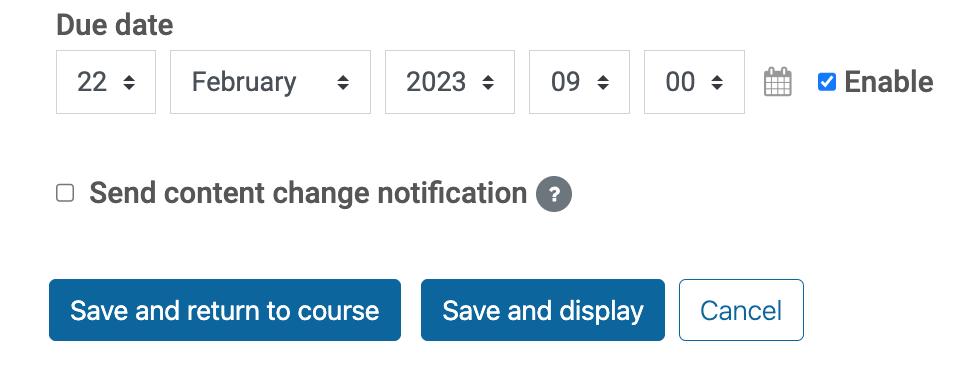
Set Assignment Due Dates
This procedure assumes that an assignment is already developed and only explains how to set due dates for that assignment. Reminder: To access the editing portion of an assignment, go to Admin Gear > Settings
Step 1
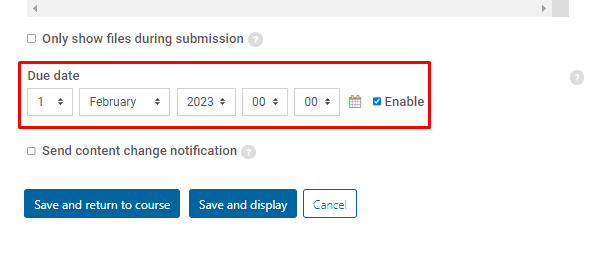
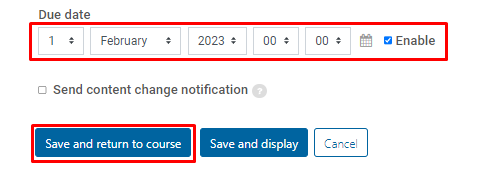
Change the Due Date if needed. If changing the Due Date is all that was required, click on Save and return to course. To adjust additional settings, proceed to Step 2.
Step 2
Click on Availability.
Allow submissions from: If set, students will not be able to submit before this date. If disabled, students will be able to start submitting right away. Check the Enable checkbox and then set the appropriate date and time.
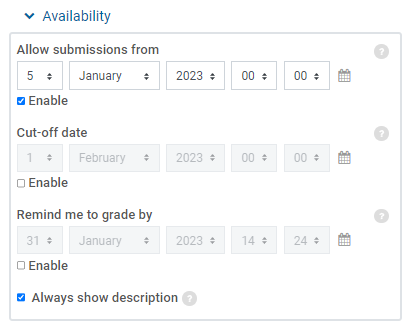
Cut-off date: If set, the assignment will not accept submissions after this date without an extension. Check the Enable checkbox and then set the appropriate date and time.
Step 3
Scroll to the bottom of the page and click on Save and return to the course.
Step 4
Check your work by clicking the Course Dashboard.

Step 5
Scroll down to Activities and Resources and click Assignments. Now you can see a list of the assignments and their due dates.


If you see the dates are still incorrect, please click on the assignment name, then click on the gear at the top right to access the Settings, and follow the directions once more.
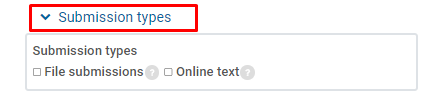
DeleteSpecify Acceptable File Types
Reminder: These steps can be viewed from the editing portion of the assignment. To access it, go to Admin Gear > Settings in the general view of the assignment that needs editing.
Step 1
Click the Submission types dropdown
Step 2
Select File submissions.
Step 3
Type in the file extension you will accept; separate multiple file types with a comma. You can also click on Choose to select from a list of available file types.
Step 4
Click Save and display to view, or Save and return to the course to return to the week where the assignment is placed.
Assignment Submission Settings
Step 1
Click on the Admin gear on the top right and click on Settings.

Step 2
You'll see a list of settings to the right of the screen.
Step 3
Click Submission settings
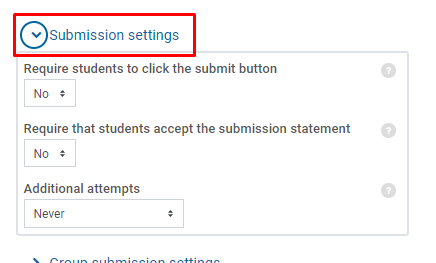
Step 4
The default options are the recommended settings, implying an easier submission for students.
Step 5
When finished, click Save and return to the course or Save and display to view the assignment.
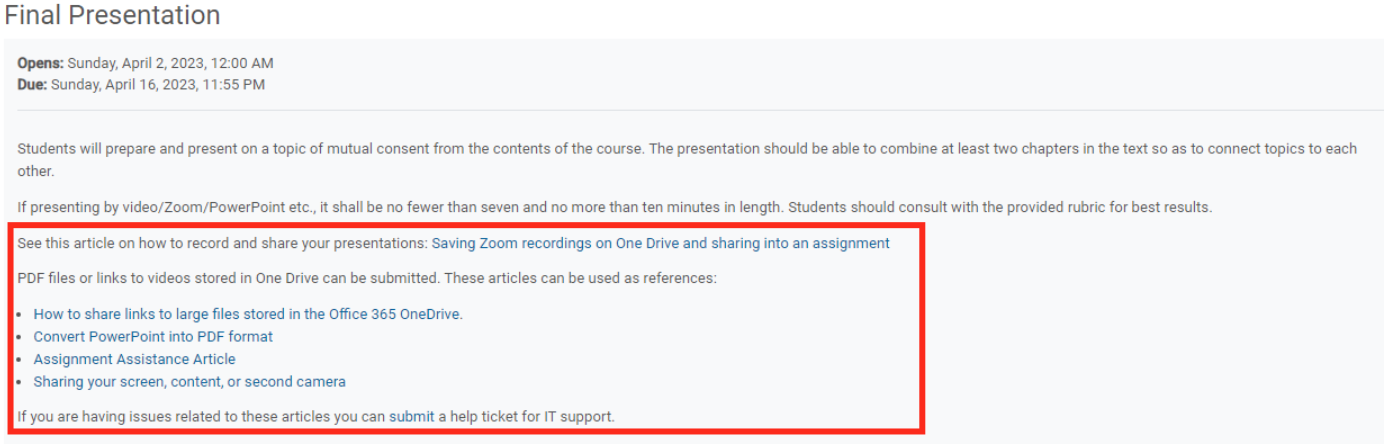
Large File Submission | Advanced
This portion of the article will assist in setting up assignments that require videos, audio recordings, presentations, and other files larger than 10MB.
Step 1
Enter the assignment settings.

Step 2
Click Submission types
Step 3
Click Online text, and if desired, set a Word limit.
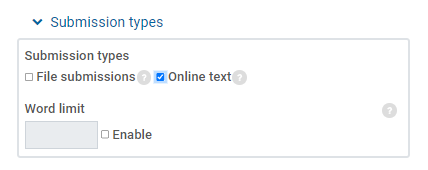
Step 4
For assignments requiring large submissions, you want to ensure that the assignment directions provide instructions for creating shareable links and copying and pasting them into the online text box. You also want to link articles related to working with large files or video submissions.
The screenshot below is an example of this type of assignment.
Assignment Restrictions
An assignment restriction will prevent students from accessing the assignment entirely until a criterion is met.
Step 1
Go to the assignment settings:

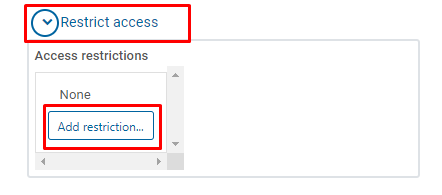
Step 2
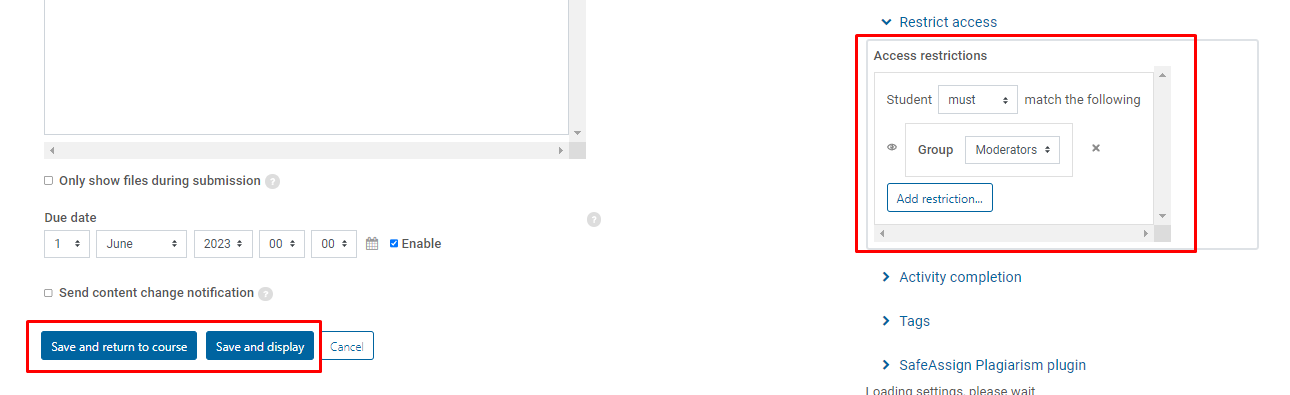
Click Restrict access and Add restriction.
Step 3
Select the restriction type:
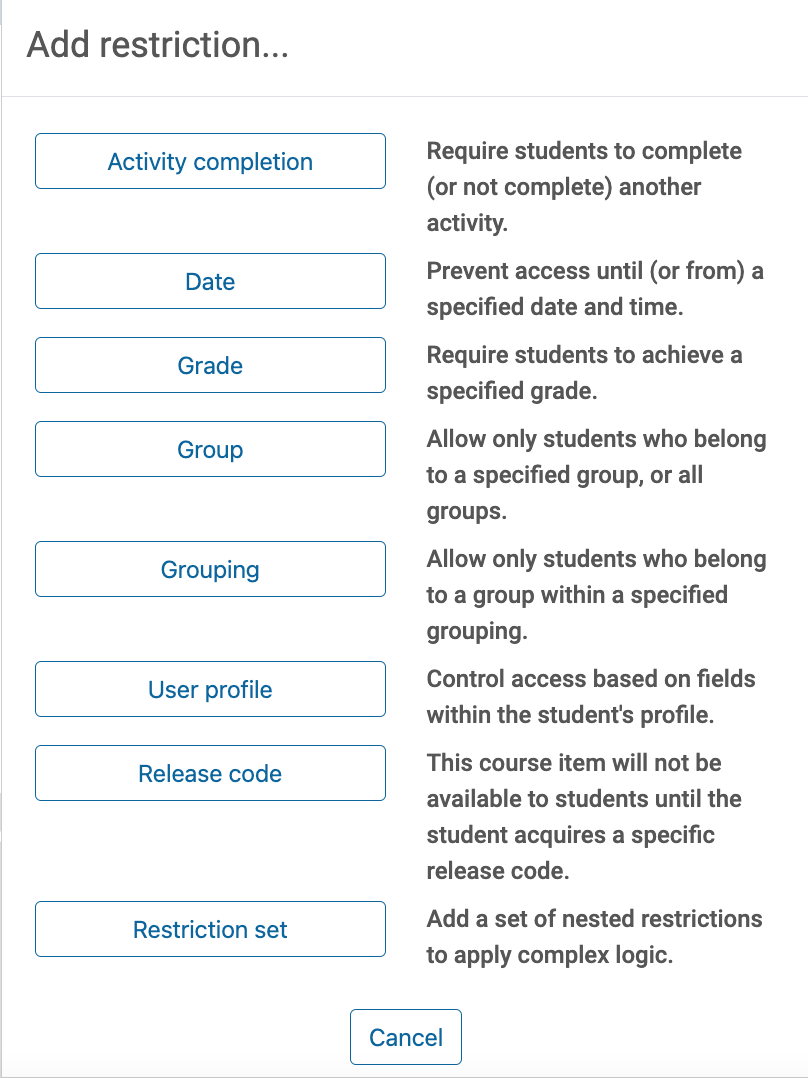
Step 4
After choosing the desired restriction, edit its settings (a group restriction was selected for this example). Once the restriction is set up, click Save and display or Save and return to course.