Overview
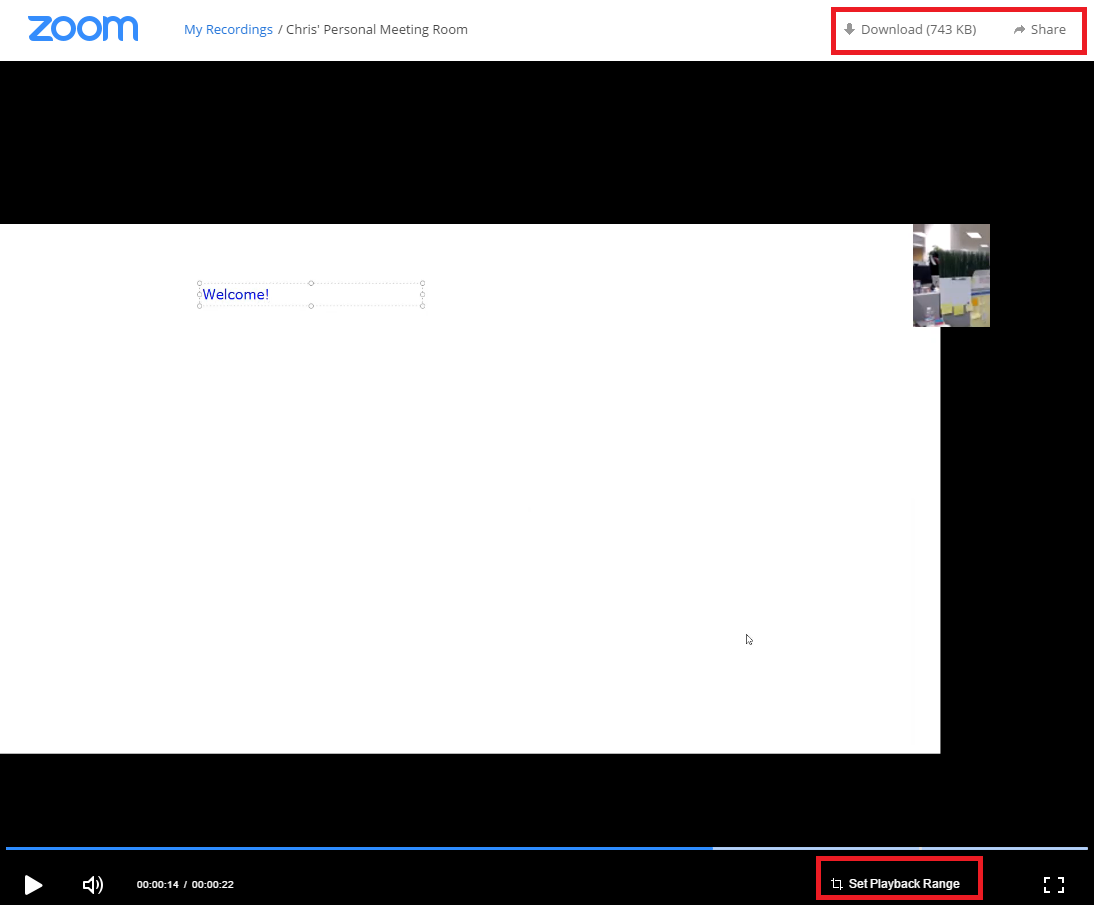
When you click a video recording on the My Recordings page, the playback video launches in a new browser tab, which includes controls for Download and Share. You can also set a playback range for the shared video so that it starts and ends at the times you specify, removing unneeded portions from the beginning and end. To share a recording permanently, please follow the directions in the Sharing Zoom Recordings with Microsoft Stream article.
Prerequisites
- Zoom account with Cloud Recording enabled
Instructions
Step 1
Log into your Zoom account on the web and click My Recordings.
Step 2
Click the meeting topic for the session that you want to play, then click the thumbnail of the video.
A new browser tab opens, showing the recording playback and the available controls.
Step 3
Click Set Playback Range.

Use the sliders to specify the start time and the end time for the recording, then click Save. 
Step 4
Click Share.
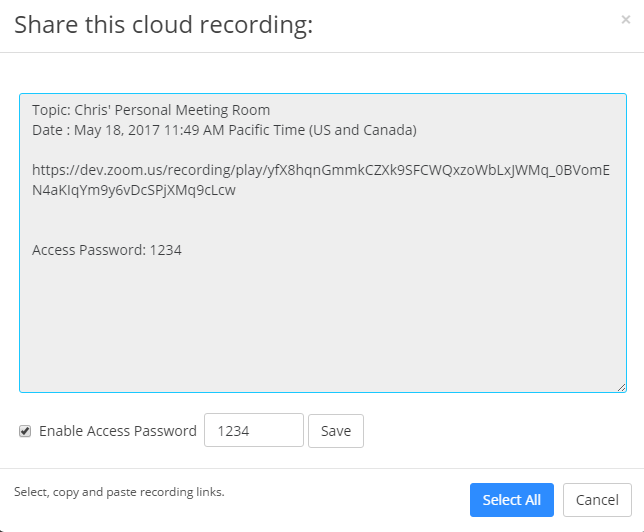
A message displays, showing the meeting topic and time along with a link to the recording, and the Access Password, if you enabled that option.
The share link provides access to the recording, which plays only the specified time range.
In your Moodle course shell, paste the recording information into an announcement. Students will also have access to the Cloud Recordings through the Zoom LTI located in the General Course Information tab.